Showing posts with label vintage. Show all posts

Monday, August 24, 2015

Mixed Berry Galette and Vintage Locker Number Revivals

I'm a week behind here in posting. Let's just keep it between us, okay?  I have been seriously busy this month working on a few painting projects that are due soon and traveling on weekends. I finally see the light at the end of the tunnel and I'm ready to get back here on a regular weekly basis.

The Farmers Market: Mixed Berry Galette.  It's hard to believe the summer will be coming to an end soon. It's been HOT here in Philadelphia and I have to say that I'm ready for fall and winter. I'll miss the fresh summer fruit though. I can barely keep it stocked in the refrigerator. This past weekend I decided that a great way to use some fresh berries was in the form of a mixed berry galette. Don't let the fancy "G" word be off putting. A galette is really just a rustic, free form pie and anything rustic is right up my alley.  It's such a simple recipe too. If you don't have time to make your own pie crust, simply buy it pre-made in the refrigerated section where the biscuits are located. It comes two to a box so you can make two galettes at once or freeze the second pie crust for another day. When I say this is easy, I really mean it. Basically, you're just rolling out the pie crust, filling it with your berries, and putting it in the oven for about 15 minutes.

The galette comes out of the oven looking as pretty as it did before it went in. Grab your fork and some vanilla ice cream and have at it.


Mixed Berry Galette
one 9 inch refrigerated pie crust
one pint strawberries, rinsed and sliced
one pint raspberries
one pint blueberries
2 tablespoons flour
2 tablespoons sugar
1 tablespoon raw sugar for dusting

1. Preheat oven to 450 degrees.
2. Roll out pie crust to approximately 12 inches.
3. Toss berries in a large bowl with flour and white sugar.
4. Place pie crust on a parchment covered cookie sheet.
5. Pour the berry mixture over the pie crust, leaving a one inch border.
6. Fold up the uncovered border over the edge of the fruit and pinch into pleats.
7. Sprinkle the raw sugar over the fruit filling.
8. Place in the oven and bake for 15 minutes or until golden brown. Serve warm or at room temperature.

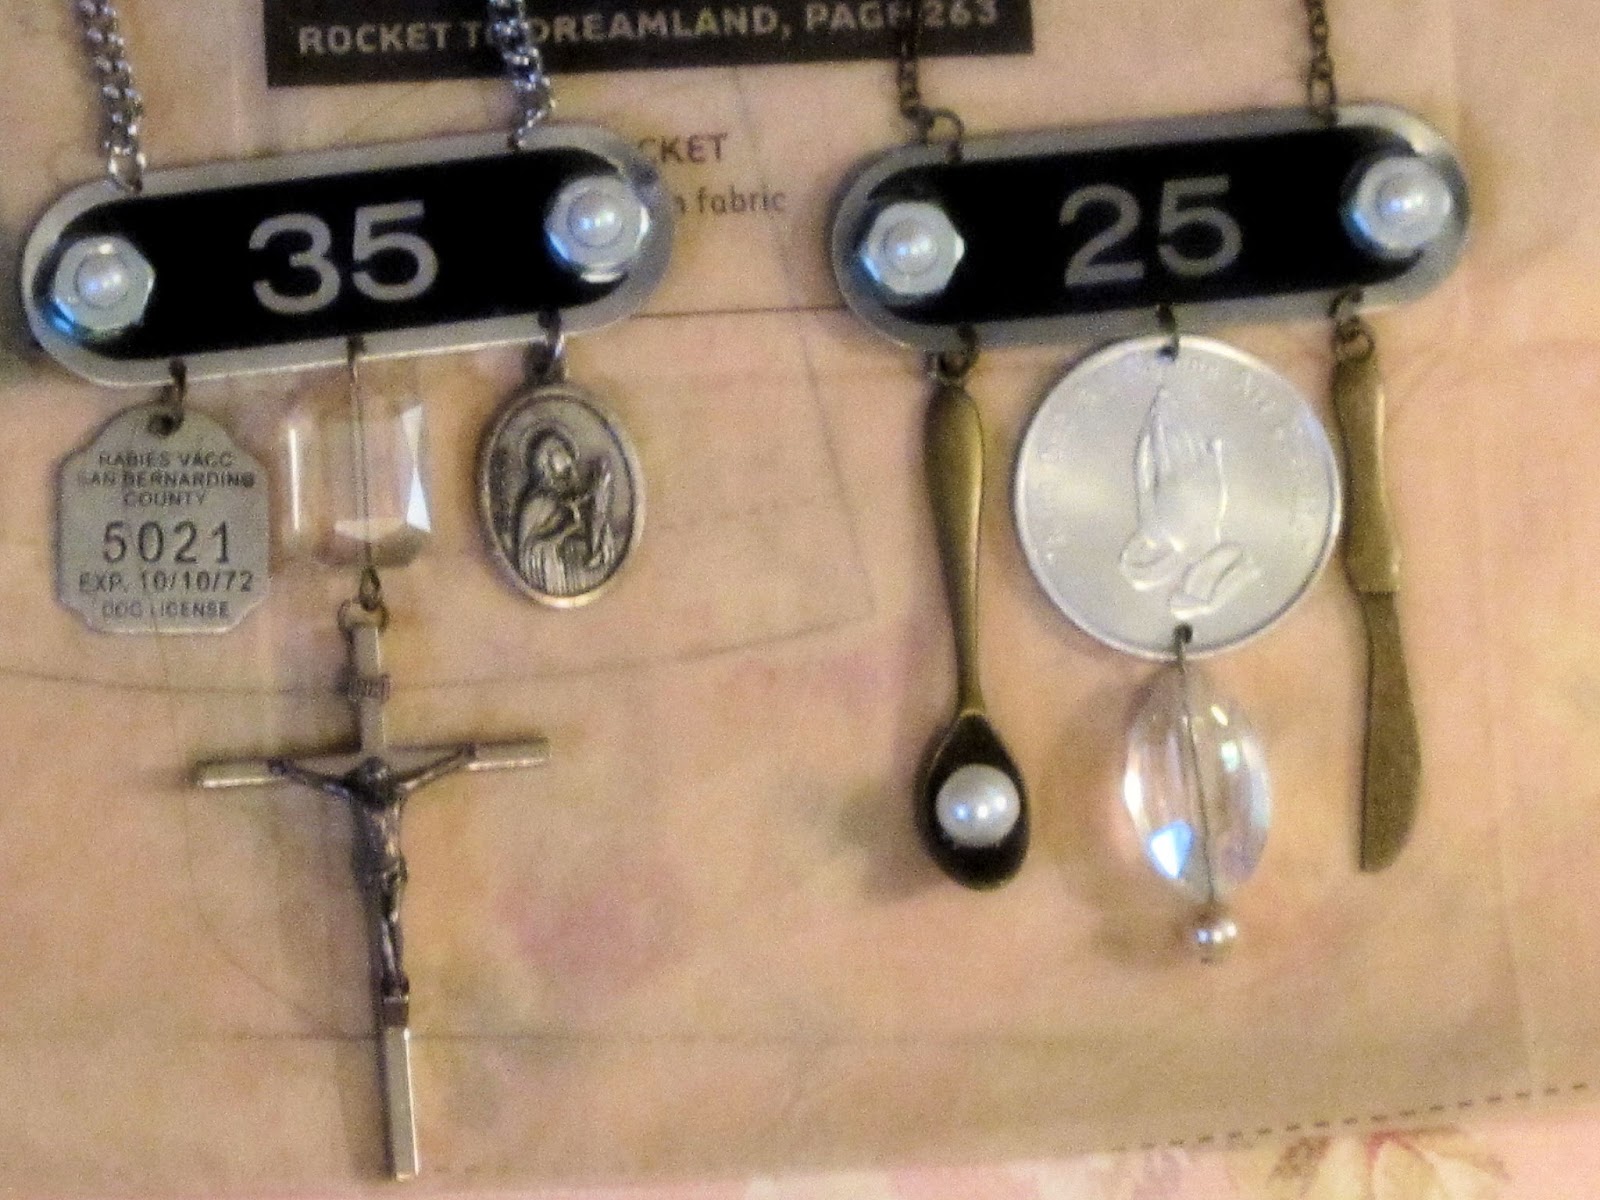
The Find: Vintage Locker Number Revivals.  This week's find came from a flea market near my house. I was delighted when I rounded a corner to find a booth filled with childhood memories. I wish I was one of those people who could recite my locker combination from 7th grade. I am not. In fact, I still have recurring dreams about having to go back and finish my last year of high school. I'm always running around trying to find classrooms and my locker and when I finally find my locker, I can't remember the combination. Oh, the horror.  Still, I love me some old school!!!  This was one of those scores where I came home and did the palm to forehead smack. I only purchased two locker numbers when there was a whole box of them. I should have been greedy because these were so much fun to work with.


I've always been smitten with religious medallions and such. For this project, I seemed especially preoccupied with crosses and medallions. Maybe it's because Frank is coming for his visit to our city of brotherly love next month and our community has been abuzz with talk of all things pope. 

I haven't named #35 yet but I've decided on "Daily Bread" for #25. 


Sunday, August 2, 2015

The Monster Avocado Toast Sandwich and A Ten Commandments Revival

The Farmers Market: The Monster Avocado Toast Sandwich.  This week's trip to the farmers market includes simple ingredients that are plentiful and easy to find.  One of my favorite breakfast sandwiches of all time is an avocado fried egg sandwich on toast.  A few days ago I found a great recipe on Food52 for The Monster Avocado Toast Sandwich which elevates my regular morning favorite to a whole new level. With so many healthy add-ins, this is no longer just for breakfast. I think this sandwich is just the answer when you want something easy and healthy for dinner on those nights when you want to spend as little time in the kitchen as possible.  I've made some very minor adaptations to the original ingredients but once you see how simple this is to throw together, I'm sure you'll have your own adaptations too.


The Monster Avocado Toast Sandwich
2 pieces of your favorite kind of toast
1/2 of an avocado
Fresh ground pepper
sea salt
Pesto (I used homemade because my mother had a bumper crop of basil)
A few thin slices of cucumber
2 slices of tomato (I used a yellow heirloom)
2 thick slices of fresh mozzarella
A small handful of greens (I used romaine but spinach would work nicely too)
1 fried egg

1. On one slice of toast, smash the avocado with a fork, spread from end to end, and sprinkle sea salt and black pepper.

2. On the other slice of toast, spread a nice layer of pesto.

3. Distribute the fillings between the two pieces of toast and smash it all together into one big sandwich of love.

The Find: A Ten Commandments Revival. I really can't express how excited I was when I found this vintage gold plated ten commandments charm bracelet at a local thrift store. For starters, I'm a freak for old charm bracelets. The fact that the charms have the ten commandments etched on to them is a solid score for me.


It really should come as no surprise that I opted to transform the bracelet into a one of a kind sparkling necklace. A little bit of drilling, some sparkling crystal beads,, costume pearls and some recycled chain was all it took to end up with this:


The necklace will be for sale in my Etsy store. You'd better hurry though; with the pope visiting my town in September it might not be around for long ;)

Sunday, July 26, 2015

Simple Strawberry Sauce, a BONUS, and tea towel revivals

The Farmers Market:  Simple Strawberry Sauce. This is the final week of mason jar goodness. This week I decided to feature a simple strawberry sauce that won't be around for long after you make it. The beauty of this recipe is that it's so ridiculously simple to prepare. The fact that strawberries are plentiful and delicious this time of the year makes it even better. In our house, my daughter has been setting the standards for healthy eating. We talk quite often about the excessive amount of white sugar added to so much of the foods that Americans buy. Another reason why I love this recipe is that there are only two tablespoons of added sugar. The real sweetness comes from the fresh strawberries. Yesterday I purchased my berries from the Amish farmers market two towns over. Once the sauce is made and cooled, pour it into a pint sized mason jar and store in the refrigerator. You'll find all kinds of great culinary uses for it from ice cream to waffles to cheesecake topping.


Simple Strawberry Sauce
one pound fresh strawberries, sliced
1/8 cup of water
2 Tablespoons sugar
1 Tablespoon fresh lemon juice
1 teaspoon vanilla extract

Bring all of the ingredients to a boil in medium saucepan. Reduce to simmer until the sauce thickens, about 5-10 minutes. Let cool and pour in to a pint size mason jar. Keep refrigerated.

THE BONUS: Pimento Cheese. I loved finding uses for my mason jars so much this month that I decided to throw in a bonus here. I was surfing the web a few days ago when a recipe for Pimento Cheese caught my eye. When I think of this kind of cheese, I usually think of the processed cheez wiz style concoction in the jar. This recipe uses sharp cheddar cheese, coarsely grated.


The most obvious way to enjoy this is to put it in a bowl with some pretzels and dip away.


By now you might be wondering where "the farmers market" comes in to play. Well, that's where the Heirloom tomatoes from the Overbrook Farmers Market come in.


The math is really simple on this one: homemade pimento cheese + heirloom tomatoes=
Grilled Pimento Cheese and Heirloom Tomato Sandwich. And you get extra points if you pair the sandwich with the dill pickle spears from week two!


Pimento Cheese Spread
2 cups sharp yellow cheddar, coarsely grated (8 oz)
2 cups sharp white cheddar, coarsely grated (8 oz)
1 cup drained pimentos or roasted red peppers, finely chopped
1/2 cup mayonnaise
several liberal dashes of worchestire sauce
salt and pepper to taste

Mix all ingredients together in a large bowl. Can be made 3 days ahead. Transfer to a large mason jar and keep refrigerated. Spoon spread into a bowl and serve with crackers, pretzels, vegetables and baguette slices OR spread on bread, add your favorite fillings and make a grilled cheese sandwich.

The Find: Tea Towel Revivals. This week's find comes in the form of two vintage tea towels and a long linen curtain panel; all thrift store finds. All three are 100% cotton which makes them soft and durable and easy to work with.


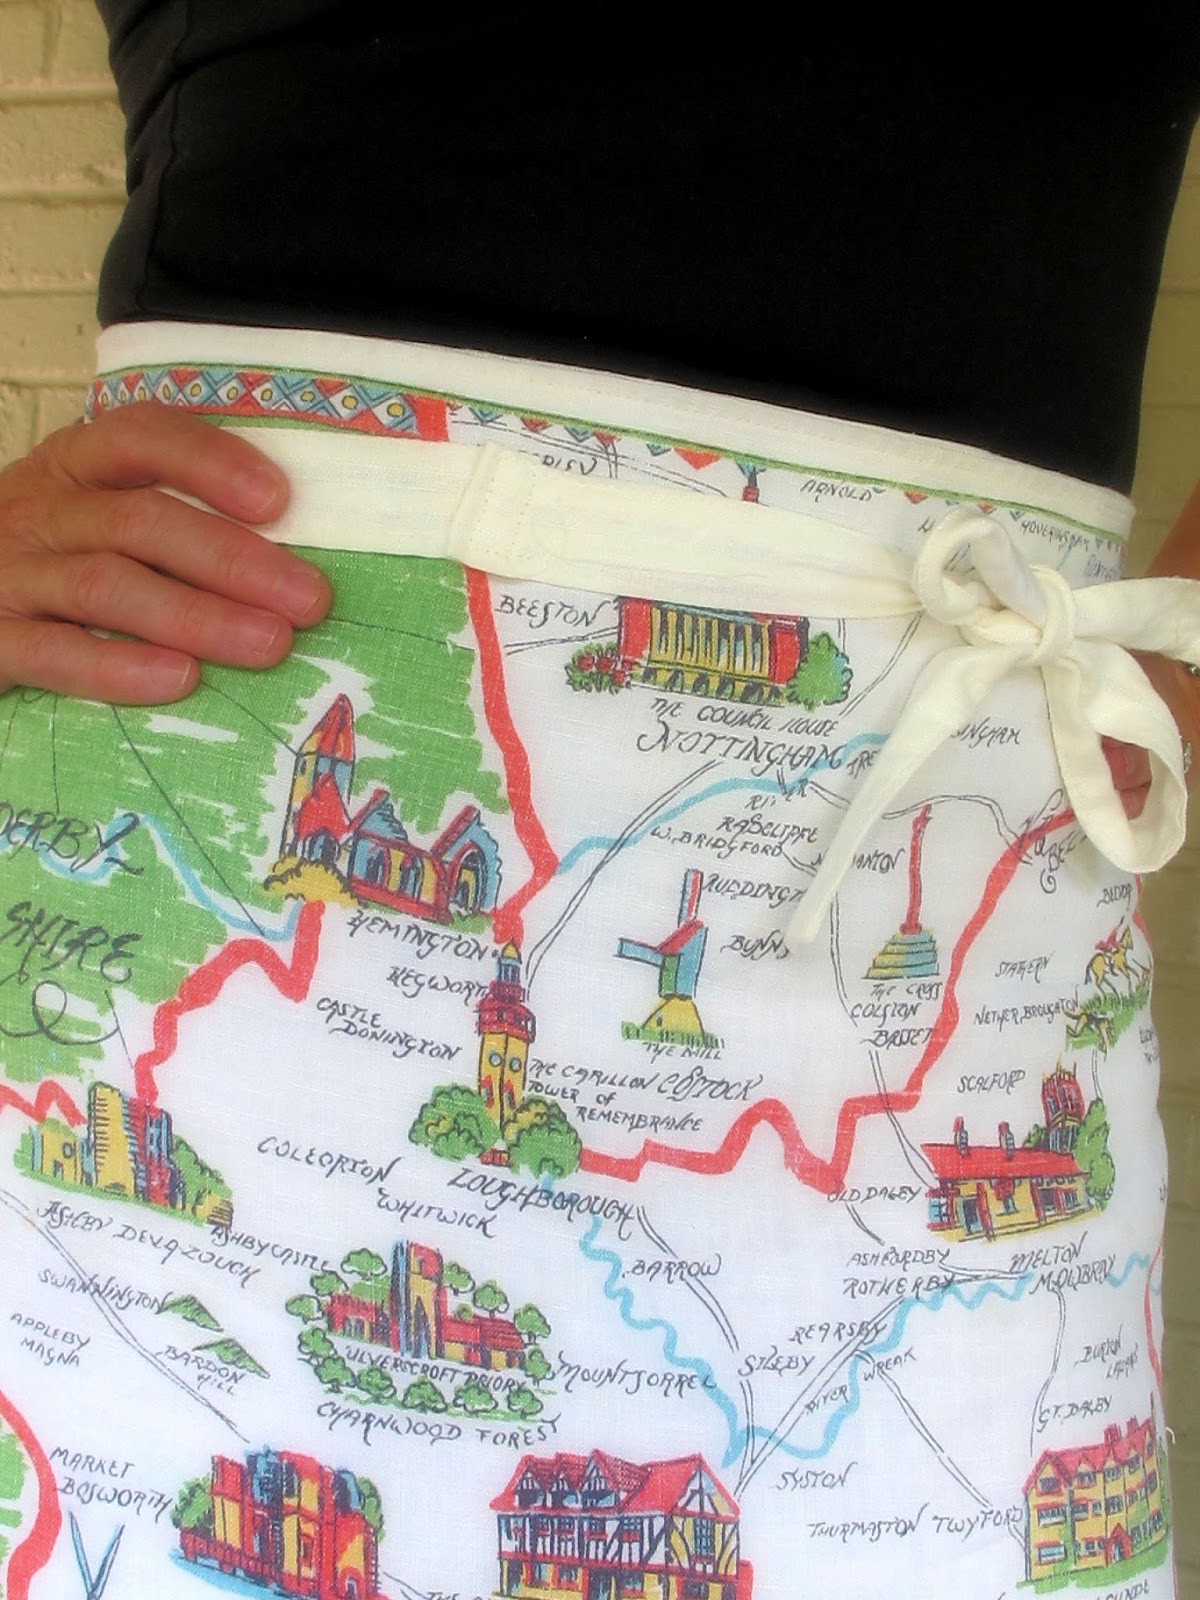
I'm an apron girl. There's just no way around it. And I don't want a mass produced apron either. I want unique, upcycled and fun. I want something that doubles as a skirt when I go to the farmers market. The choice was obvious when I saw these tea towels and curtain. Where some people walk right by the dusty old boxes of linens, I make a straight bee line for them. I call these aprons my Rustic Farm House aprons. I used the linen curtain for linings and I used the cloth tabs for the apron sashes. Nothing goes to waste here.

PS: I'll be making these available in my Etsy store.

The first apron is a shorter apron made from a tea towel from Leicestershire, England. I love maps! Notice that I purposely attached the tea towel only across the top so that I can have the rest of it free.


The second apron is a longer one made from an awesome tea towel from Wales. It has all kinds of Welsh language and numbers on it. Makes me want to travel. How about you?


Yes, there is a face.


Sunday, July 12, 2015

Dill Pickles and The Blue Madonna

The Farmers Market: Dill Pickles I'm on week two of delicious things to put in mason jars. Summer is the perfect season for cold salads and grilling and I can't think of anything better than a nice, cold pickle spear to go alongside everything. If you're growing cucumbers in your own garden and have a bumper crop, this is an awesome way to use them up. Making refrigerator pickles is ridiculously simple. This week, because I knew I would be away on Saturday, I made my farmers market visit earlier in the week instead. This worked out better than expected because it takes a few days for the cucumbers to turn into pickles. So last night upon returning home from upstate New York, I ran straight to the refrigerator and grabbed one of the jars of pickles. Oh my. The pickles were not only delicious, they rivaled some of the best deli barrel pickles I've ever purchased at the grocery store. As God is my witness, I shall never buy store bought pickles again. My pickle spears have a nice crisp snap and are flavored just right. I think part of my secret is that I added lots of extra fresh dill and garlic cloves to my brining solution than what the original recipe called for. Also, I bought basic cucumbers. In fact, 4 regular sized cucumbers yielded 2 mason jars worth of pickles and by the time I post this, one jar is almost finished. Side note: this is a refrigerator dill pickle recipe which means no canning involved. The pickles last for up to 6 weeks in the refrigerator but don't worry, they'll be gone way before then!

Refrigerator Dill Pickles
3 1/2 cups water
1 1/4 cup white vinegar
1 Tablespoon sugar
1 Tablespoon sea salt
4 regular size cucumbers, cut into quarters and each quarter cut in half (this will yield 8 spears per mason jar)
2 heads of fresh dill
2 cloves garlic, peeled and whole

 1. Stir water, vinegar, sugar and sea salt in a saucepan over high heat. Bring to a boil; remove from heat. Cool completely.

 2. Using two mason jars, place 8 cucumber spears, a handful of fresh dill, and garlic cloves (I used 4) in each jar. Pour cooled vinegar mixture in each jar (it should come almost to the tops). Seal each mason jar and refrigerate for at least 3 days ( I waited a full 4 days). Pickles can be kept in refrigerator for up to 6 weeks.

The Find: The Blue Madonna

I've always had a love affair with religious medallions, crosses and images of the saints. I'm not sure where that came from as I was a very naughty Catholic girl (I purposely lit my program on fire during my first communion stroll down the aisle).  Yet here I am, all these years later, still enthralled with these religious items. My find this week comes from two places. I found the leaf segments in an old dusty box at the Golden Nugget Antique Market in Lambertville, NJ. There were plenty and I could kick myself that I didn't make an offer for all of them. These were the only segments with the gorgeous crystal blue flowers and pearls still intact. I wasn't quite sure what I would do with them until I found my second find, a Madonna prayer card, at the Browse Around thrift store in Ardmore, PA. I love this thrift store for so many reasons, but mainly because they always have a tin at the entrance with free medallions and prayer cards.


And The Blue Madonna was born. I had some blue crystal beads which I made into chain. I set the Madonna in an old locket, sealed her with resin and added some rhinestones.I added another big blue stone and pearl. I'm really happy with the way this turned out.